We all know exactly how to upload images to Instagram. You can either capture one directly from the app or upload one from your phone’s camera roll. Sometimes, though, you have to post from your computer. For instance, when you’re at work or don’t have your phone with you.
Instagram recently made it possible to take and share pictures and videos directly from your computer. Posting from a computer is quite useful because many individuals use their laptops to visit Instagram, especially when they have business accounts. An summary of the detailed procedure for uploading images to Instagram from a PC can be found in this guide.
Can I Upload Photos to Instagram Using a PC?
Yes, you can upload photos on Instagram using a PC.
Instagram now supports photo uploads directly from its web interface, eliminating the need to rely solely on a mobile device.
Brands and individual users alike benefit from the convenience of a larger screen and advanced editing tools available on desktop computers.
This shift is evidenced by recent updates from Instagram and highlighted in guides from industry leaders.
How to post on Instagram from PC
1. Go to Instagram and Log In
Visit www.instagram.com and sign in to your account. If you don’t have one, follow the sign-up steps to create it.
2. Click the + Icon
Once logged in, click the + icon in the top-right corner. Here, you can upload and edit photos, add a caption, set a location, edit Alt text, and adjust advanced settings.
3) Choose Your Content
Select the image or video you want to upload from your computer. Ensure your files are ready and easily accessible before starting.
4) Edit and Customize
Decide whether to crop the image or create a carousel post. You can also apply filters or adjust settings to enhance your content.
5) Add Captions and Location
Write an engaging caption to connect with your audience. If relevant, tag a location to increase visibility.
6) Share Your Post
Once everything looks good, click “Share” to publish your post. Double-check how it appears on your profile grid.
Can I Upload Videos and Reels from My PC?
Yes, you can upload videos and even Reels using your PC.
The process for videos is similar to photo uploads on the web version of Instagram. You log in, click the “+” icon, and select your video file.
However, note that some advanced editing features available on mobile may be limited on desktop.
For comprehensive video uploads, consider using third-party scheduling tools, which supports both photo and video posts, including Reels.
How to Post Videos on Instagram from Your PC
Posting a video on Instagram from your PC follows a similar process to sharing an image. The main difference is that you’ll be uploading a video, such as a Reel, instead of a static post.
1) Visit the Instagram Website and Log In
Go to www.instagram.com and log in to your account. If you don’t have an account, follow the sign-up process to create one.
2) Access the Upload Feature
Click the “+” icon in the upper-right corner of the page to start creating your post.
3) Choose Your Video
Select the video you want to share from your computer. If your video was recorded on a mobile device, make sure it’s transferred to your PC or accessible via cloud storage.
4) Crop and Edit the Video
Instagram may prompt you to crop your video or add multiple clips to create a carousel post.
5) Add a Cover Photo and Trim the Video
Select an eye-catching cover image for your video. You can also trim the video to adjust its length.
6) Share Your Video
Once everything looks good, click “Share” to publish your post. Check your profile to see how the video appears.
How to Post Reels on Instagram from Your PC
Reels are short-form videos that engage audiences with creative content. The process for uploading Reels from a PC is almost the same as posting a regular video.
1) Log In to Instagram
Visit www.instagram.com and log in to your account.
2) Click the “+” Icon
Tap the “+” icon in the top-right corner to begin.
3) Upload Your Video
Choose the video you want to upload. If recorded on a phone, ensure it’s accessible on your PC.
4) Crop and Edit Your Reel
Instagram may ask if you want to crop your video or add multiple clips.
5) Add a Cover Photo and Trim If Needed
Pick an engaging cover photo to grab attention. You can also trim the video for a better fit.
6) Publish Your Reel
Click “Share” to post your Reel. Check your profile to see how it appears.
Advantages of Uploading Photos from a PC
Uploading from a PC offers several distinct advantages.
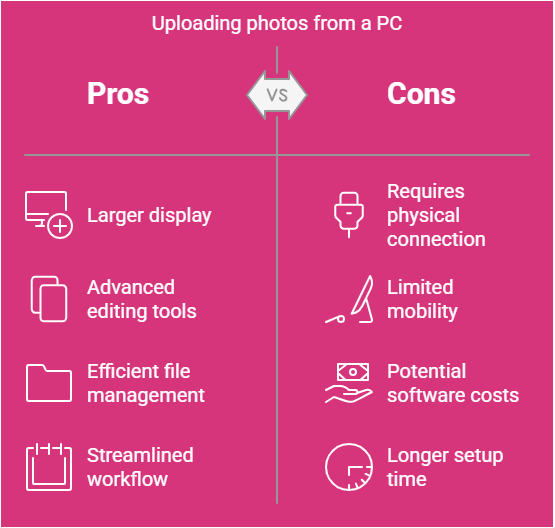
- Larger Display: Editing and reviewing your images on a larger screen can help you ensure the best composition and detail.
- Advanced Editing Tools: Use your desktop software (e.g., Adobe Photoshop, Lightroom) to fine-tune images before uploading.
- Efficient File Management: Organize and manage your photo library more easily, which is beneficial for digital marketers handling bulk content.
- Streamlined Workflow: Scheduling posts and managing multiple accounts can be more efficient with desktop-based tools.
These benefits contribute to a more professional and controlled posting process, as noted by social media experts
Common Troubleshooting Tips When Uploading from a PC
Common issues can usually be resolved with a few simple troubleshooting steps.
- Refresh Your Browser: If the upload button doesn’t appear, try refreshing the page or clearing your cache.
- Check File Format & Size: Ensure your photo is in JPEG or PNG format and conforms to Instagram’s recommended dimensions (typically 1080 pixels wide).
- Update Your Browser: Make sure you’re using the latest version of your web browser to avoid compatibility issues.
- Disable Extensions: Sometimes, browser extensions or ad blockers can interfere with website functionality—disable them temporarily if needed.
- Try Incognito Mode: This can help rule out issues caused by stored cookies or cached data.
These tips are drawn from user discussions on Reddit and expert troubleshooting guides
Tips for Better Instagram Engagement
- Post Consistently – Maintain a regular posting schedule to keep your audience engaged.
- Use High-Quality Visuals – Clear, eye-catching images and videos attract more interactions.
- Write Engaging Captions – Ask questions or share interesting insights to spark conversations.
- Leverage Hashtags Wisely – Use relevant hashtags to increase discoverability.
- Engage with Your Audience – Reply to comments, DMs, and engage with followers’ content.
- Utilize Instagram Stories & Reels – Short, engaging content boosts visibility and engagement.
- Post at Optimal Times – Analyze when your audience is most active and schedule posts accordingly.
- Run Contests & Giveaways – Encourage participation and attract new followers.
- Collaborate with Influencers – Partnering with influencers expands your reach.
- Track & Analyze Performance – Use Instagram Insights to refine your strategy.
Recommended Third-Party Tools to Upload Photos from a PC
Several third-party tools can simplify and enhance your Instagram posting workflow.
Popular tools include:
- Hopper HQ: A robust scheduling platform that allows you to plan, edit, and bulk-upload posts directly from your desktop. It offers additional features like grid planning and team collaboration, making it ideal for businesses.
- Buffer & Later: Both are widely used for scheduling posts across multiple platforms, including Instagram.
- Gramblr: Although less popular today due to security concerns, some users still mention it as a possible solution.
Using these tools can help you manage a more efficient content calendar and provide additional insights through analytics.
How to Maintain Photo Quality When Uploading from a PC
Maintaining photo quality involves proper resizing and compression.
Instagram compresses images automatically, so to minimize quality loss, you should:

- Resize Your Images: Adjust your photos to 1080 pixels in width—the ideal dimension for Instagram.
- Choose the Right File Format: Save images as high-quality JPEGs (typically at around 70–80% quality) to balance quality and file size.
- Use Editing Software: Editing your photos in professional software before upload allows you to control compression settings and color profiles.
These methods are frequently recommended by photographers and social media professionals on platforms like Reddit.
How to Simulate a Mobile View on My PC for Instagram Uploads
You can simulate a mobile view using your browser’s developer tools.
On browsers like Google Chrome, you can press Ctrl+Shift+I (or Cmd+Option+I on a Mac) to open Developer Tools.
Click the mobile device icon to toggle the device toolbar, which emulates a smartphone screen.
This trick makes Instagram believe you’re on a mobile device, granting access to additional features that might not be visible on the default desktop view.
Many social media managers use this technique to access functionalities such as uploading multiple images or posting Stories when needed. This method is commonly discussed in forums and tutorials.
What Limitations Should I Expect With Instagram’s Desktop Uploading?
Understand the constraints of using Instagram’s native web version for posting.
The desktop uploading feature comes with a few limitations compared to the mobile app.
- Reduced Editing Options: While you can crop and adjust your photos, the array of filters and editing tools is more limited.
- No Story Uploads: Currently, Instagram’s web interface does not support uploading Stories directly.
- Single-Image Posts: Some advanced features, like multi-image carousel posts, may not be as intuitive on the desktop version without using developer tools.
Despite these limitations, the convenience of a PC and the support of third-party tools often outweigh the downsides for many users.